Creating Your First Anvil Project
Overview
Anvil is the ConnexCS scripting and configuration platform. The extension connects to an Anvil project to give you a live editing environment with version history, external-edit detection, and the other features described in this guide.
Steps for creating the Project
Step 1 — Sign in
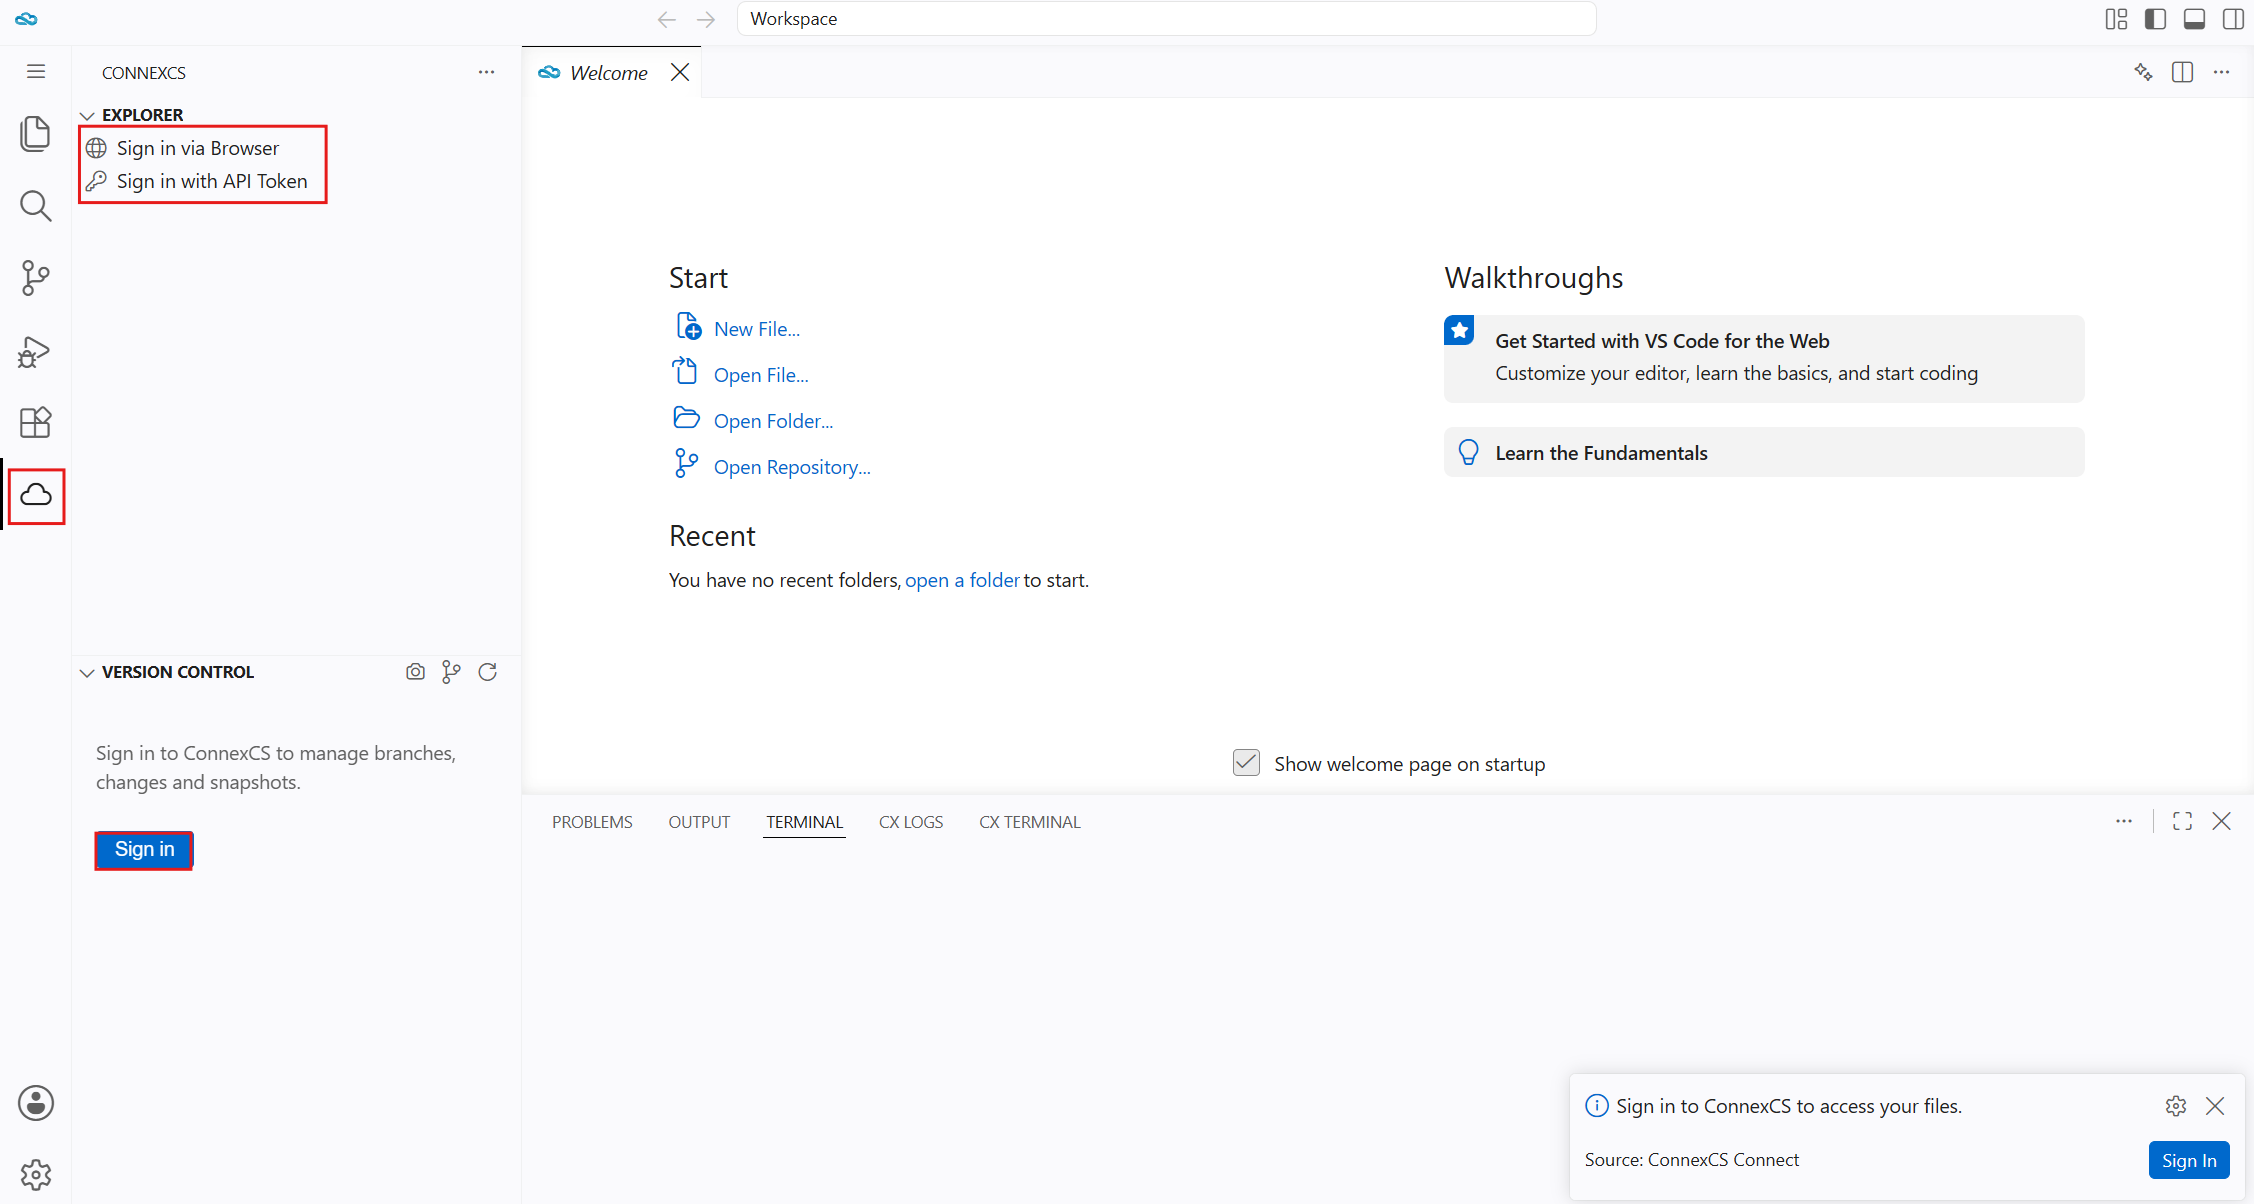
- Open the ConnexCS IDE (code.connexcs.com) or open VS Code with the ConnexCS extension installed.
- Click the ConnexCS icon in the Activity Bar on the left (bottom).
- You will have two options to sign-in:
Sign in via BrowserSign in with API Token- Enter your ConnexCS account credentials and sign in.
Step 2 — Open or create a project
- Once signed in, the Explorer panel shows your available Anvil projects.
- To open an existing project, click on Browse Projects.
- To create a new project, use the New Project button (or the equivalent option in the ConnexCS portal at
app.connexcs.com)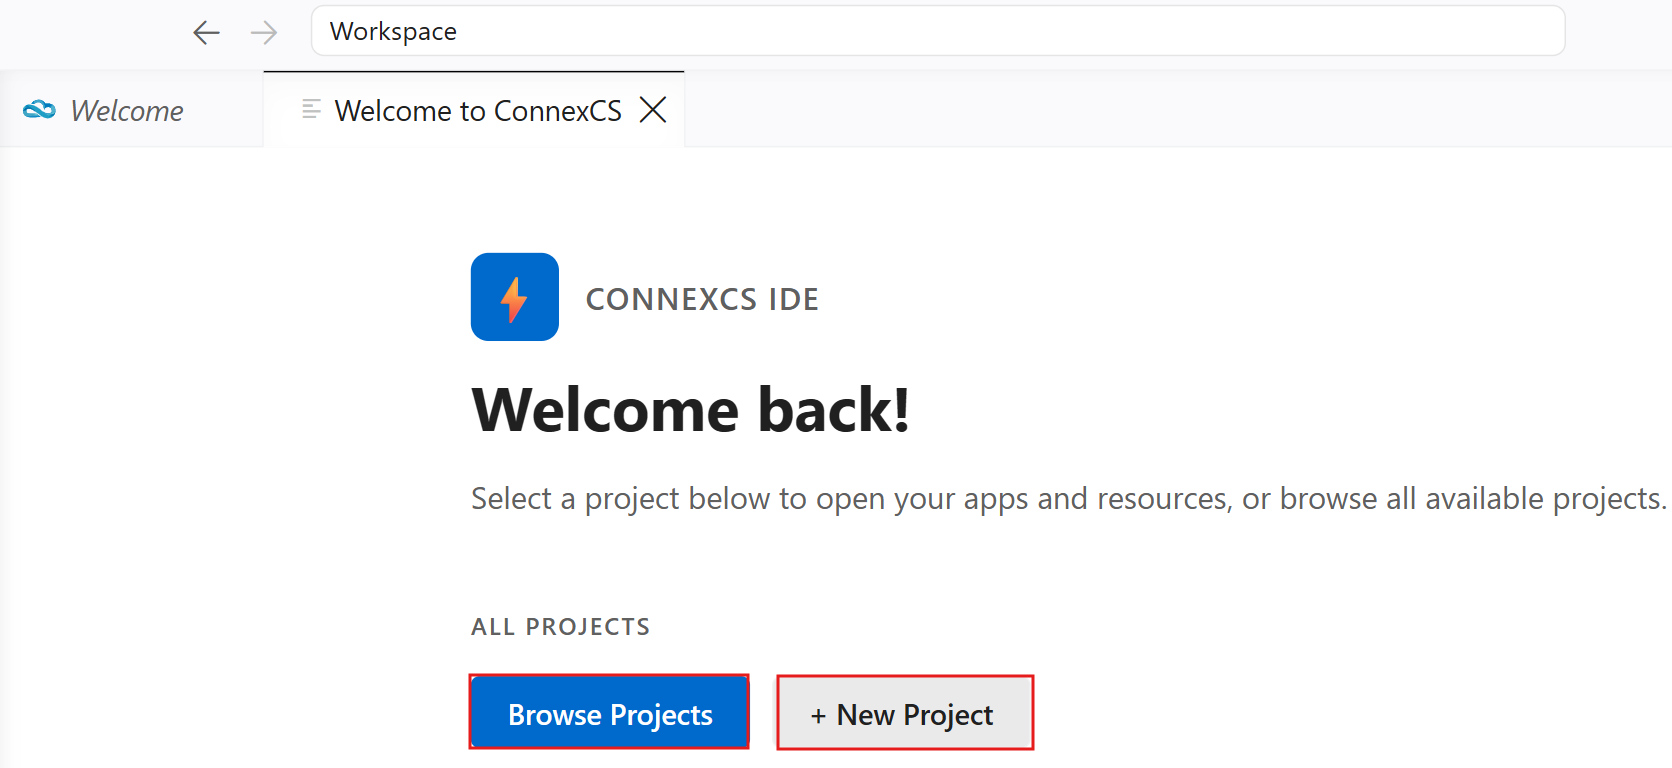
- OR Click on the
+sign in the Explorer to create a new project.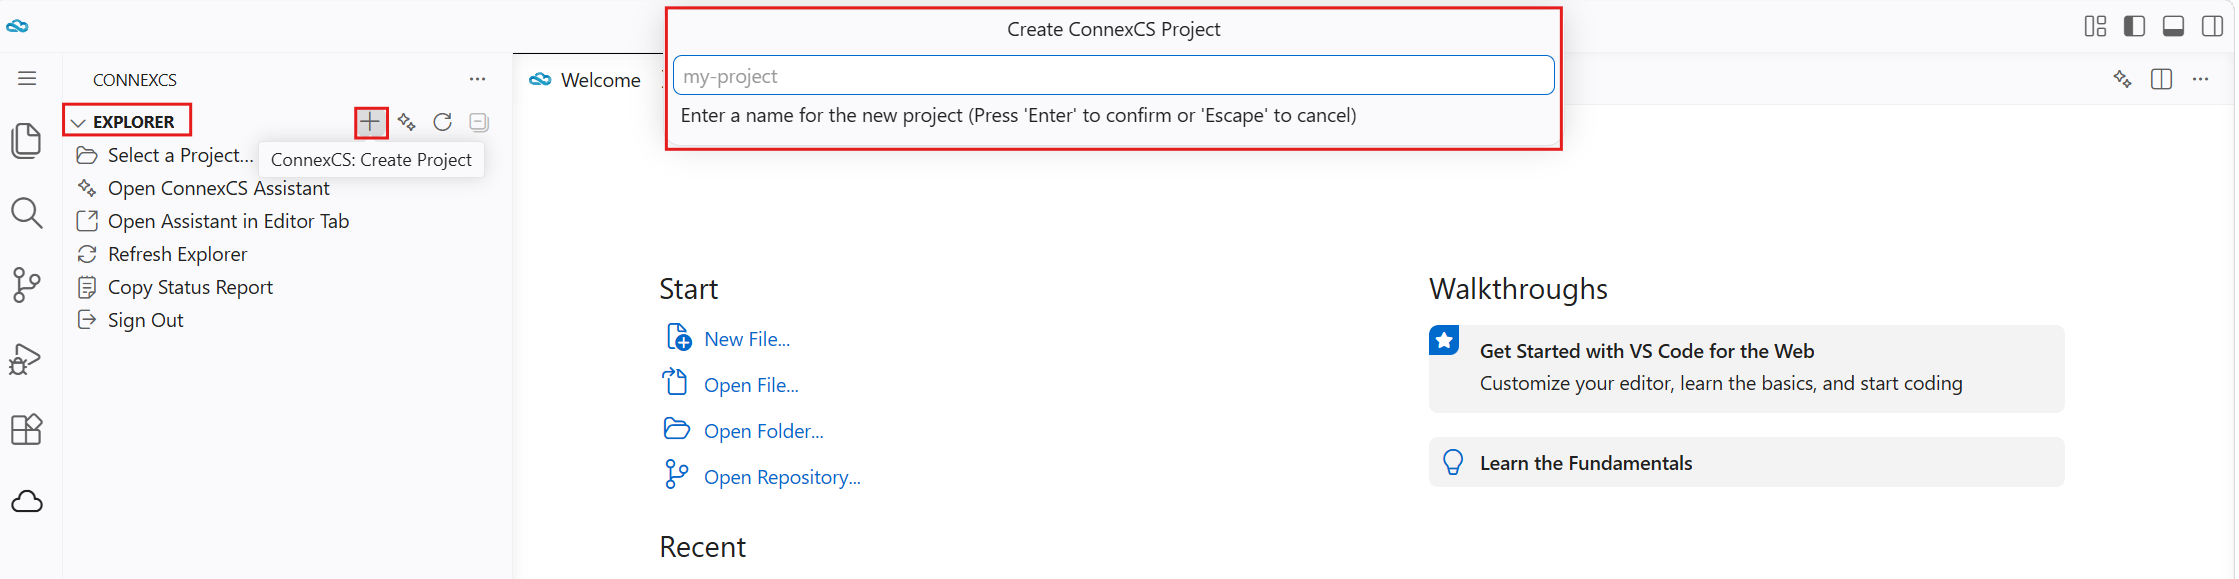
Step 3 — Browse and open files
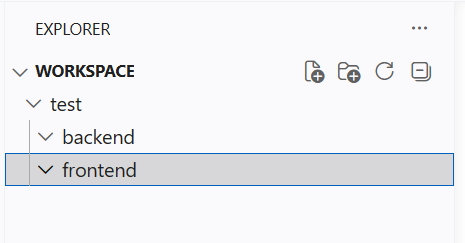
- Expand your project in the Explorer to see folders such as
backend/,frontend/, etc. - Click any file to open it in the editor. The file is served live from the ConnexCS platform.
Step 4 — Write a simple script
-
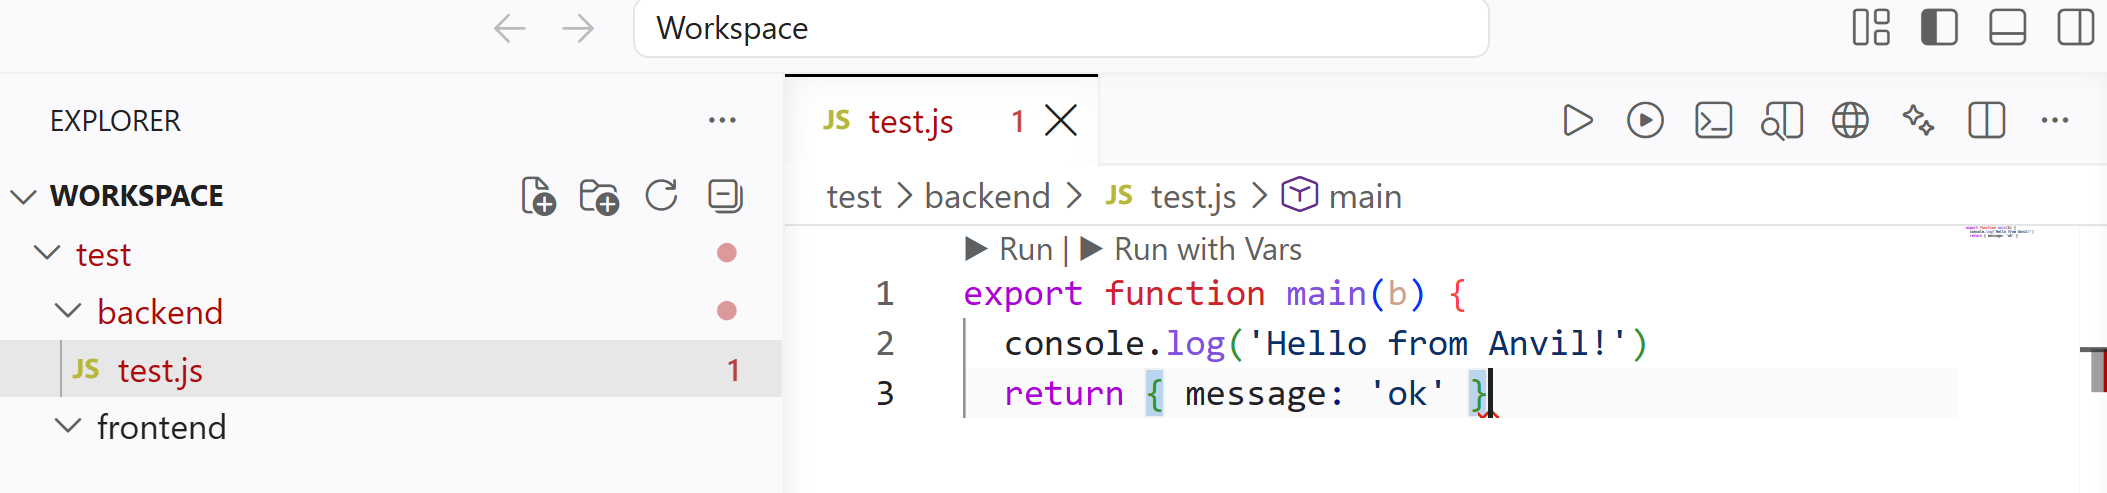
In the backend folder create a
.jsfile. -
A minimal ScriptForge backend file looks like this:
export function main(b) {
  console.log('Hello from Anvil!')
  return { message: 'ok' }
}
Save the file with Ctrl + S (or Cmd + S on Mac). The extension sends the file to the ConnexCS platform.
Step 5 — Run the script
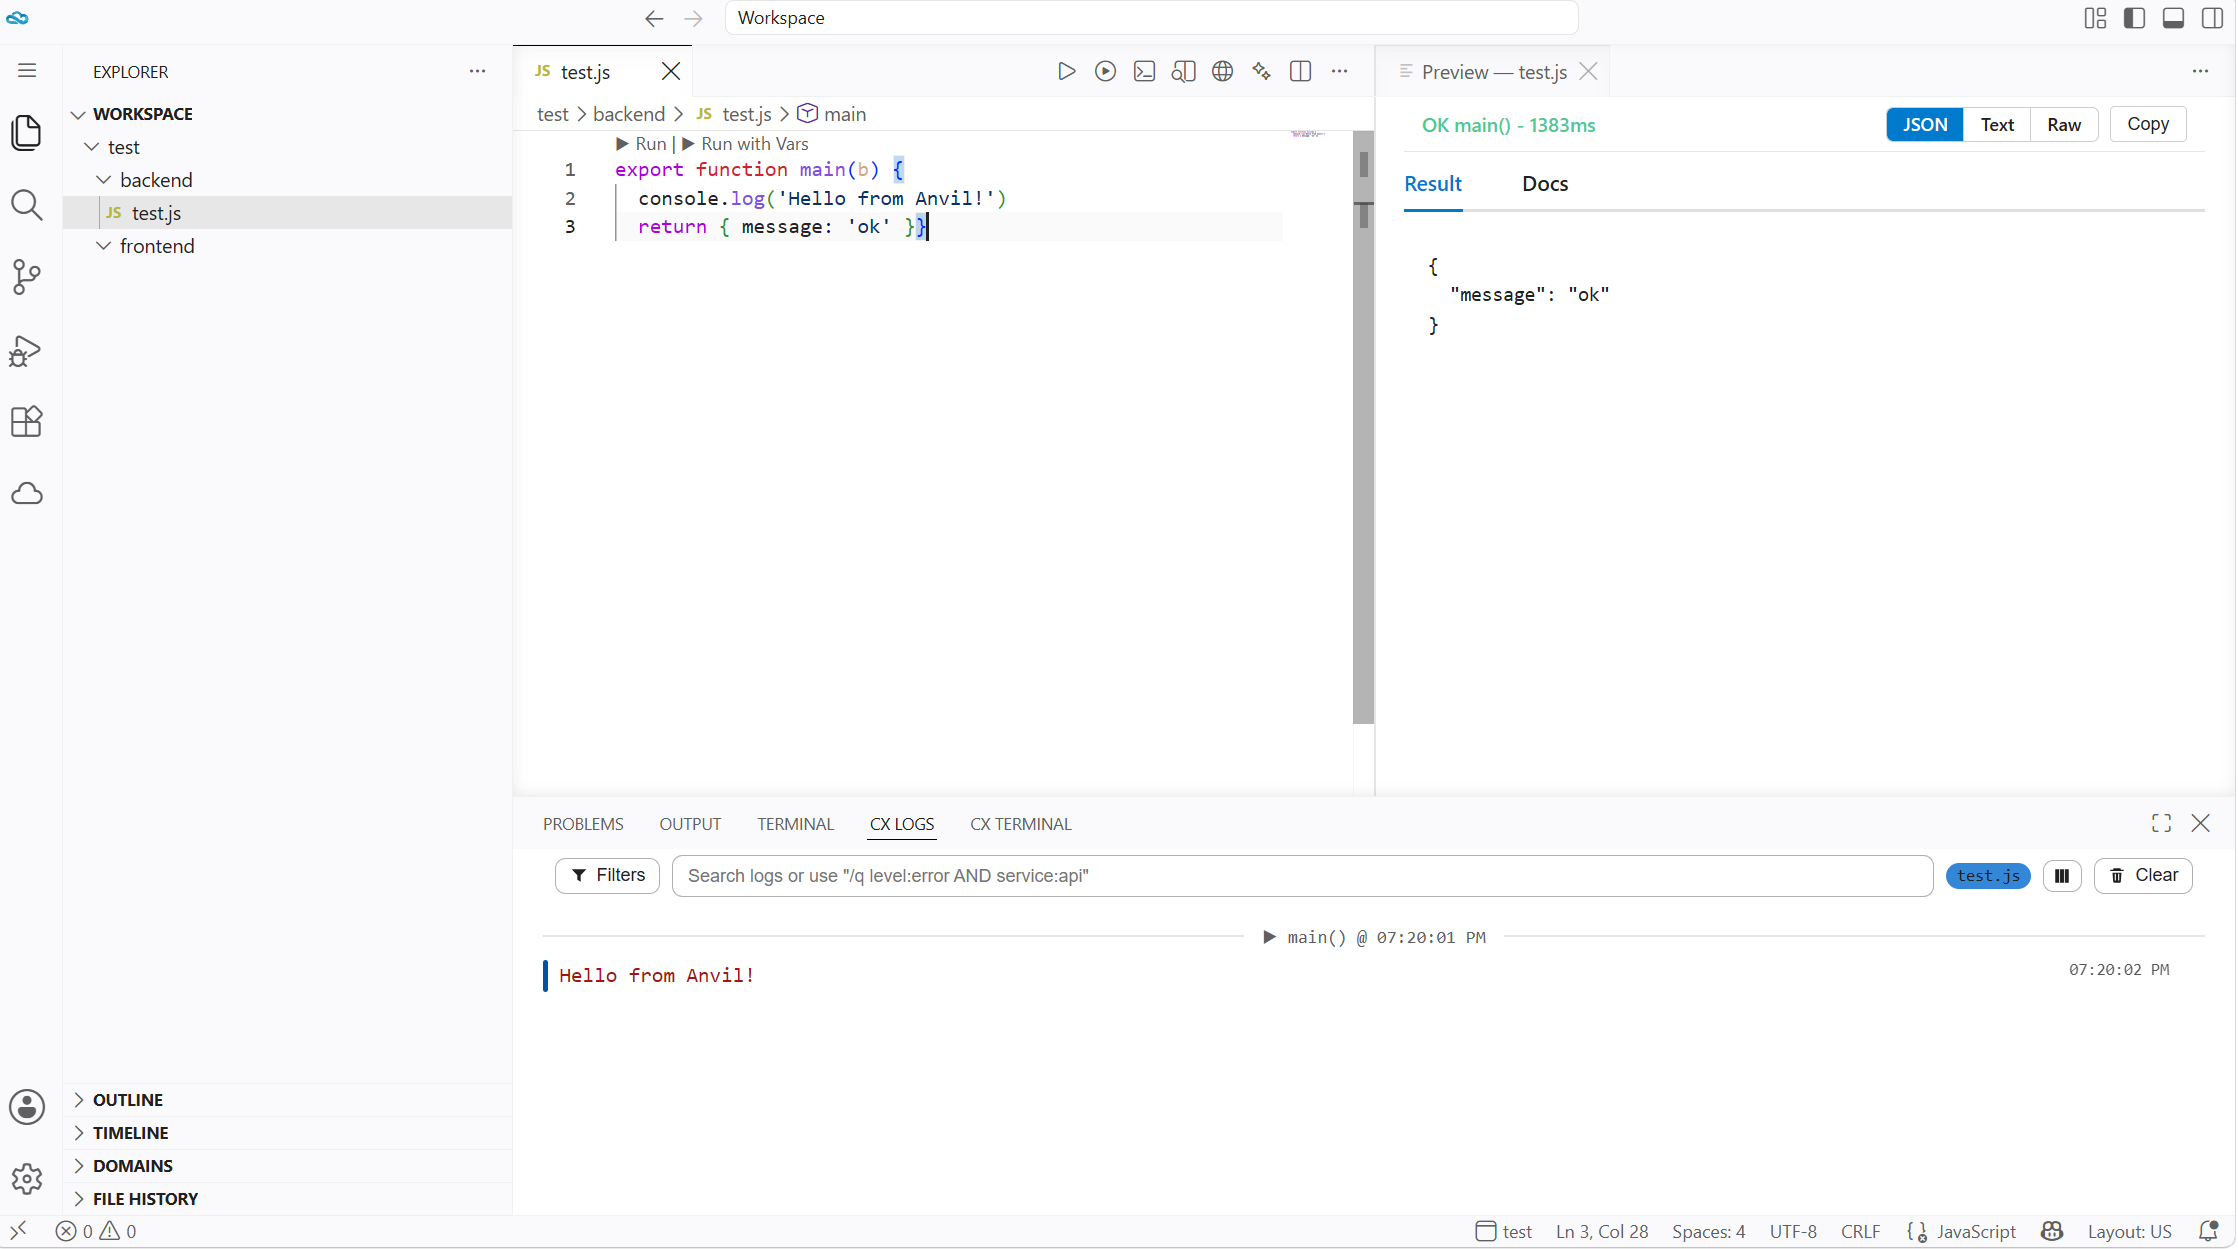
- Click Run in the editor toolbar (or Run with Vars to supply test variables).
- Output appears in the Cx Logs panel at the bottom of the screen.
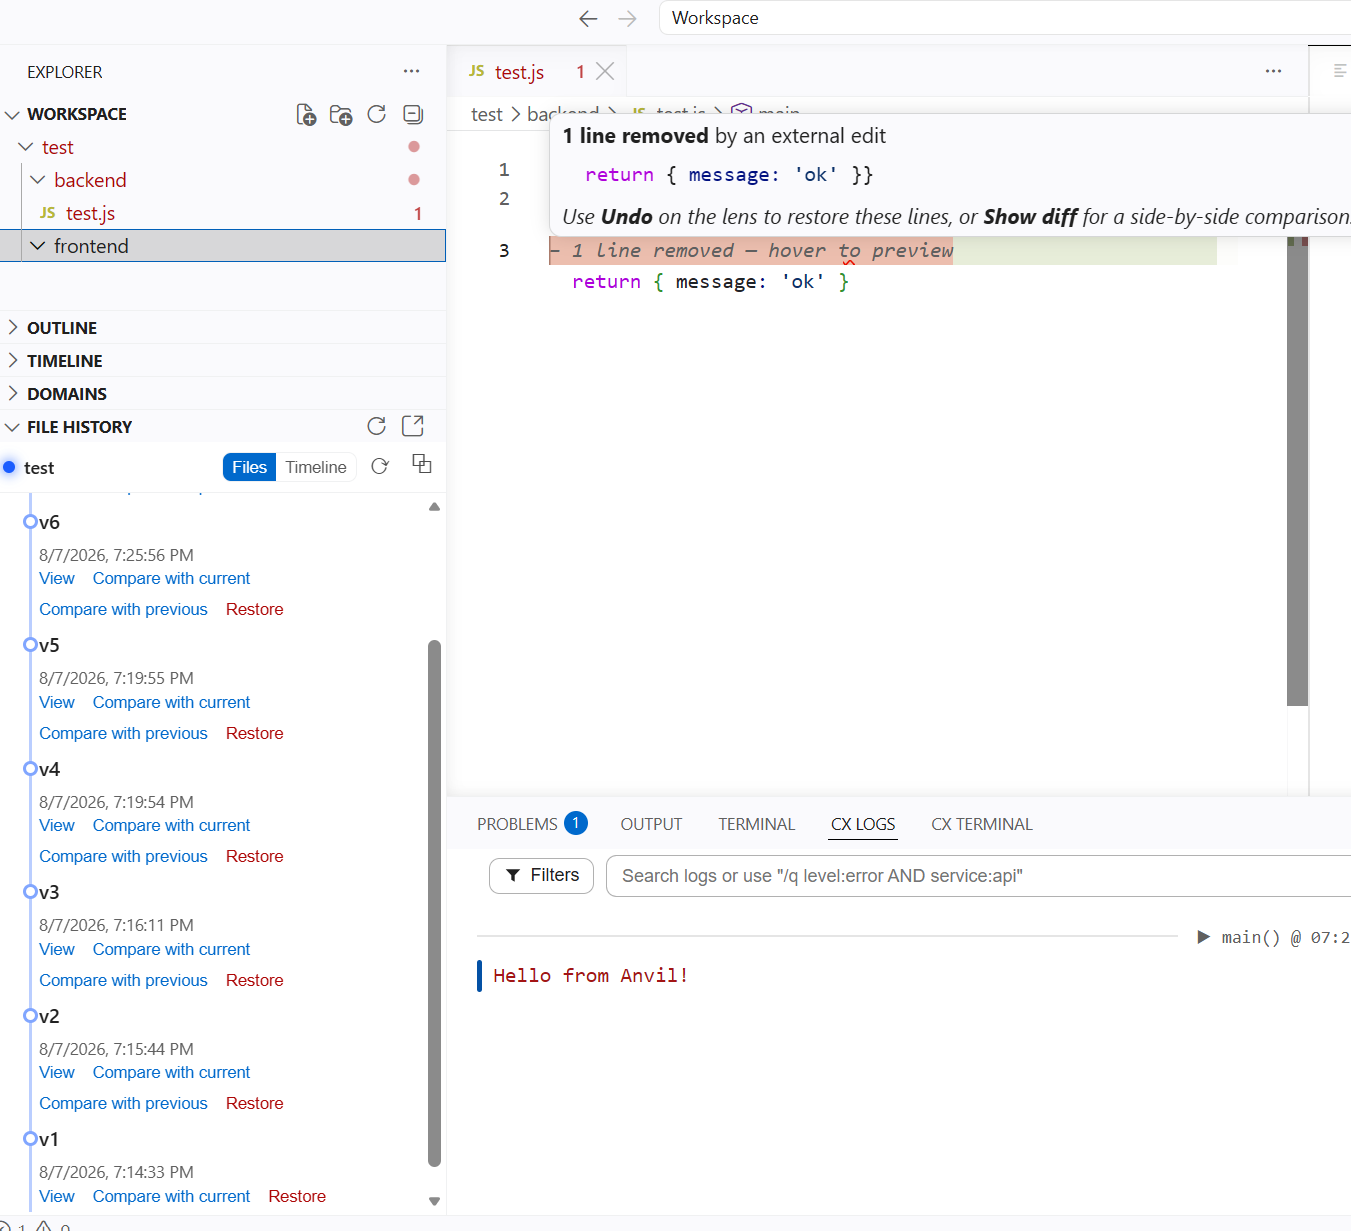
Step 6 — View and restore version history
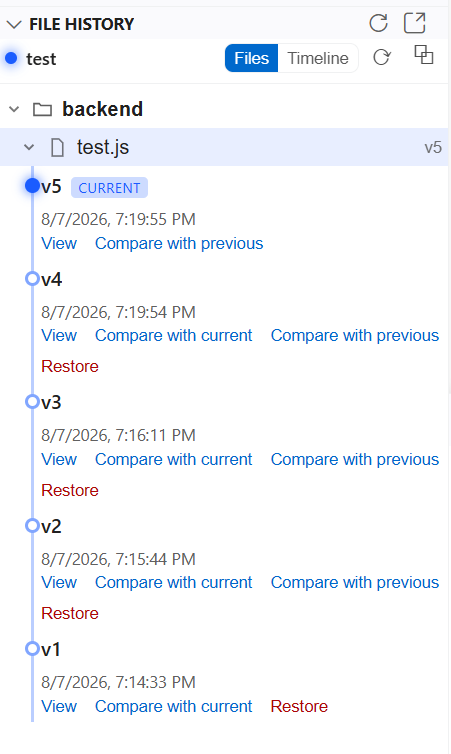
- Open the File History panel from the Activity Bar.
- Expand a file to see all saved versions with timestamps.
- Click a version and choose Restore to roll the file back to that point. The External Edit Review highlights will appear automatically.
Behaviour across editors
The feature works the same way whether you are using:
- The ConnexCS web IDE at code.connexcs.com
- VS Code Desktop with the ConnexCS extension installed from the VS Code Marketplace
- Eclipse-based IDEs (Eclipse Theia, Eclipse Che, etc.) and any editor that pulls from the OpenVSX Registry — the extension is published there too
- VS Code-compatible editors such as Cursor, Windsurf, VSCodium, or any other editor that supports the VS Code extension format, whether from the VS Code Marketplace, OpenVSX, or by installing the
.vsixfile directly
The extension must be signed in and connected to a ConnexCS project for external edits to be detected.
Quick reference
| What you want to do | How to do it |
|---|---|
| Accept one changed region | Click Keep above that region |
| Revert one changed region | Click Undo above that region |
| See full deleted content | Hover the pink − N lines removed banner |
| Open a side-by-side comparison | Click Show diff (appears when lines were deleted) |
| Accept all changes at once | Click Keep All (appears when 2+ regions are highlighted) |
| Revert all changes at once | Click Undo All (appears when 2+ regions are highlighted) |
| Restore a file to a previous version | Use the History panel → Restore, then Keep/Undo as needed |
| Selectively apply parts of a historical version | History panel → Compare with current → Keep/Undo per region |