Getting Started
Document Metadata
Category: Development → Anvil → IDE
Audience: Developers, Solution Engineers, Administrators, Technical Teams
Difficulty: Beginner
Time Required: 5–10 minutes
Prerequisites: A ConnexCS account with access to Anvil IDE and at least one Anvil project.
Related Topics: Document Guide — documentation standards, Anvil IDE Interface — workspace overview, ScriptForge — backend scripting, Query Builder — SQL development, Anvil Apps — frontend development, CX Terminal — command-line tools.
Next Steps: Sign in to the Anvil IDE, select an Anvil project, explore the workspace, create or edit files, and begin developing your application using the available development tools.
Overview
This guide describes the initial setup and configuration of the Anvil IDE. It covers the authentication process, accessing the hosted development environment, selecting an Anvil project, and understanding the project workspace.
After completing this guide, you'll have a configured development environment ready for building, editing, testing, and managing Anvil applications
Signing In
- Login to your Control Panel.
- Click on Anvil IDE from the left-menu.
- A new tab will open and redirect you to
code.connexcs.com. - Click on
Sign In to ConnexCS. -
When you open the IDE for the first time, the ConnexCS panel on the left sidebar shows two sign-in options:
-
Sign in via Browser — Opens a browser window for OAuth sign-in with your ConnexCS account. Recommended for most users.
-
Sign in with API Token — Paste a ConnexCS API token directly if you prefer token-based access.
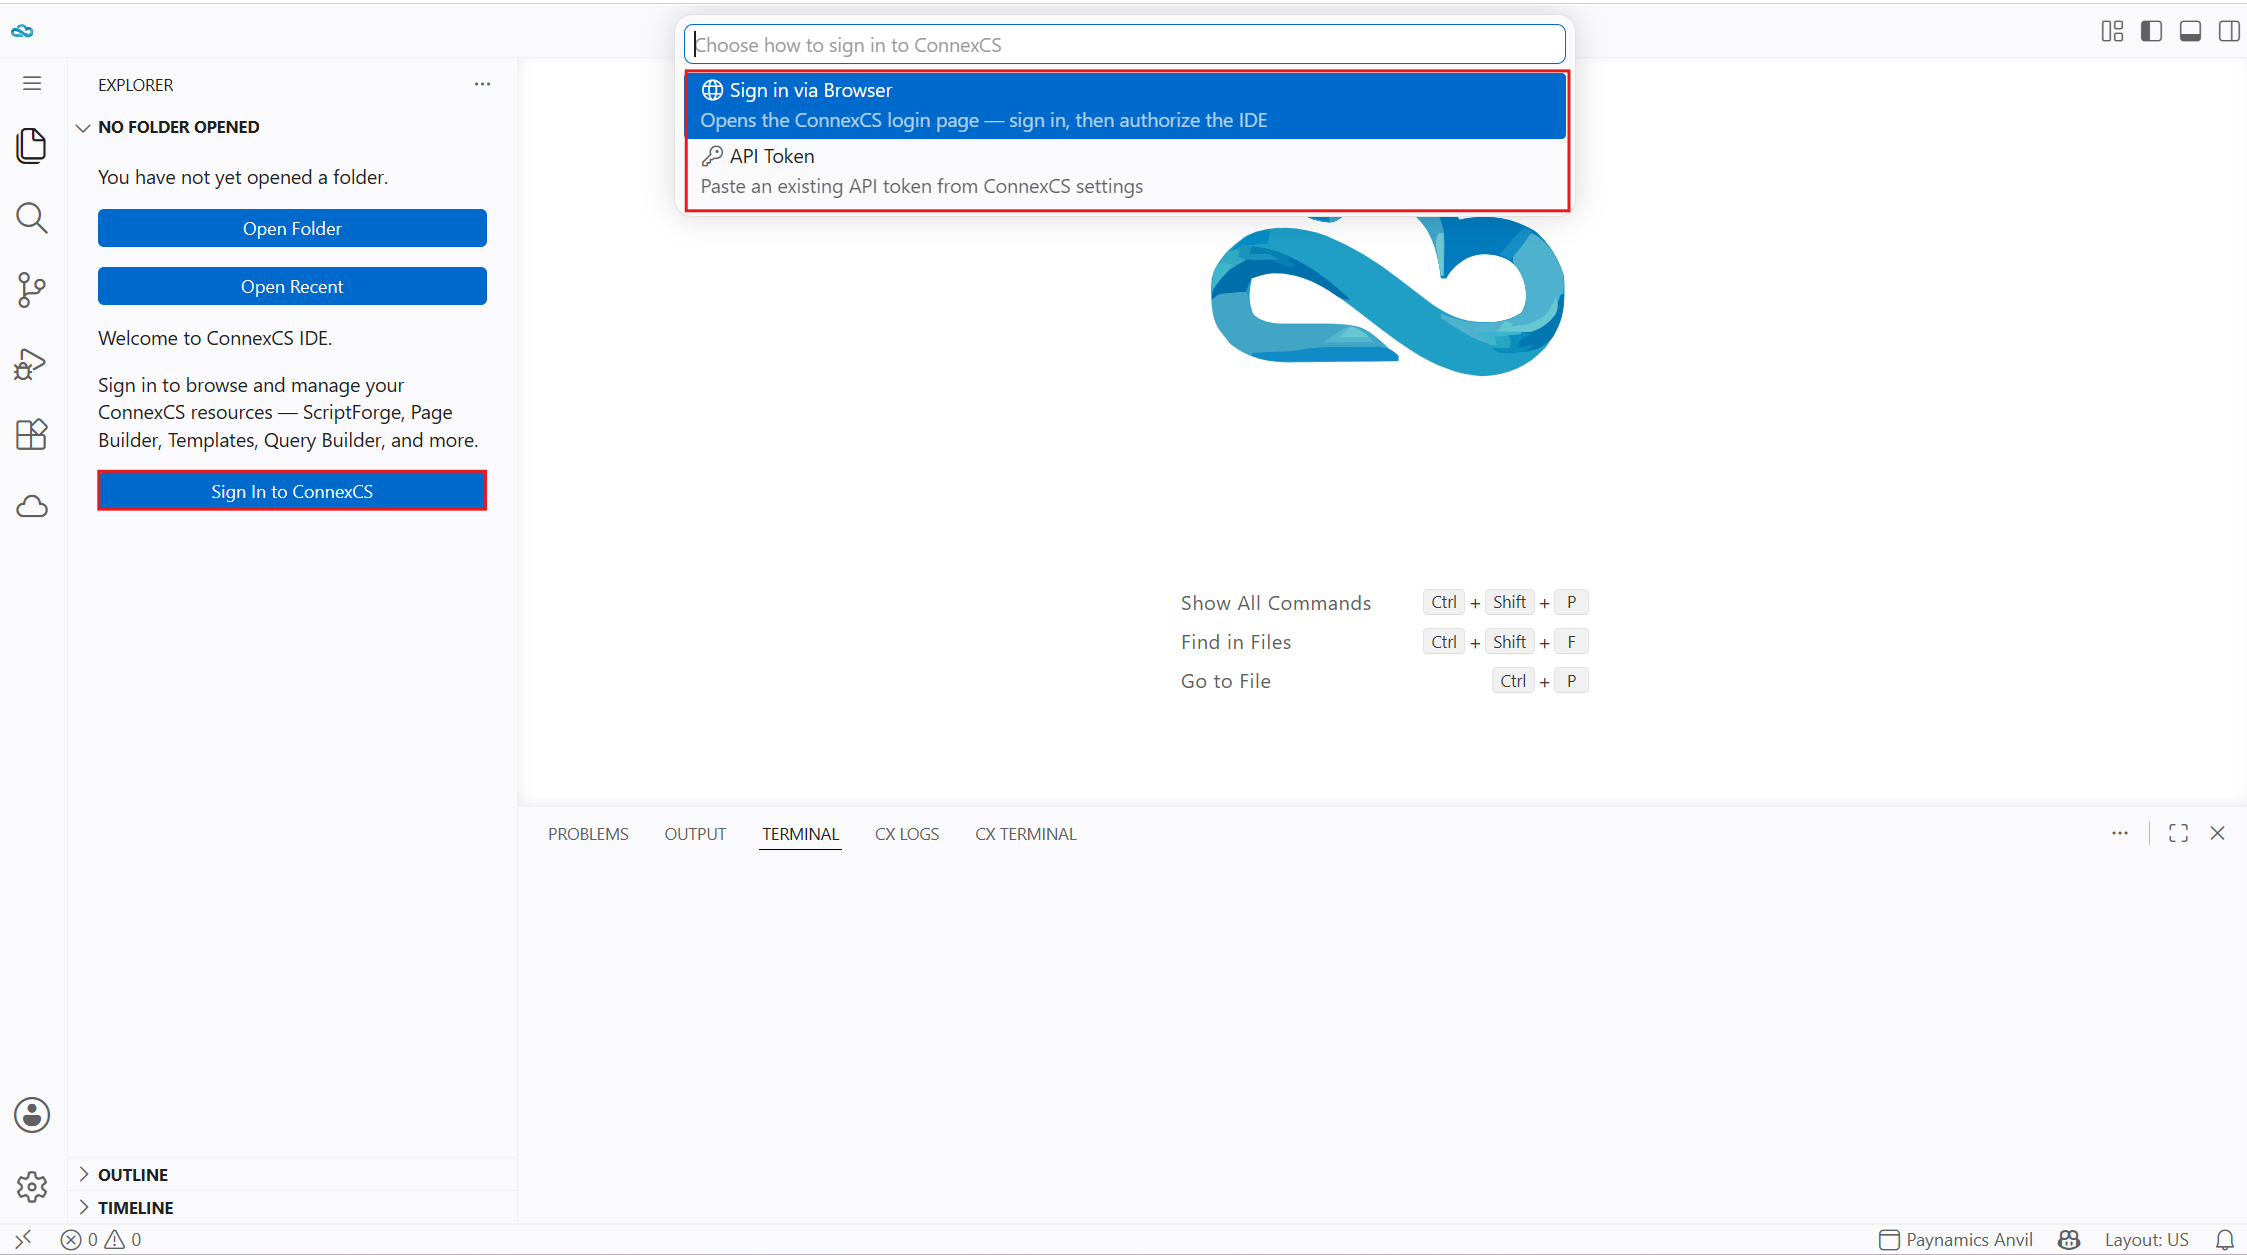
-
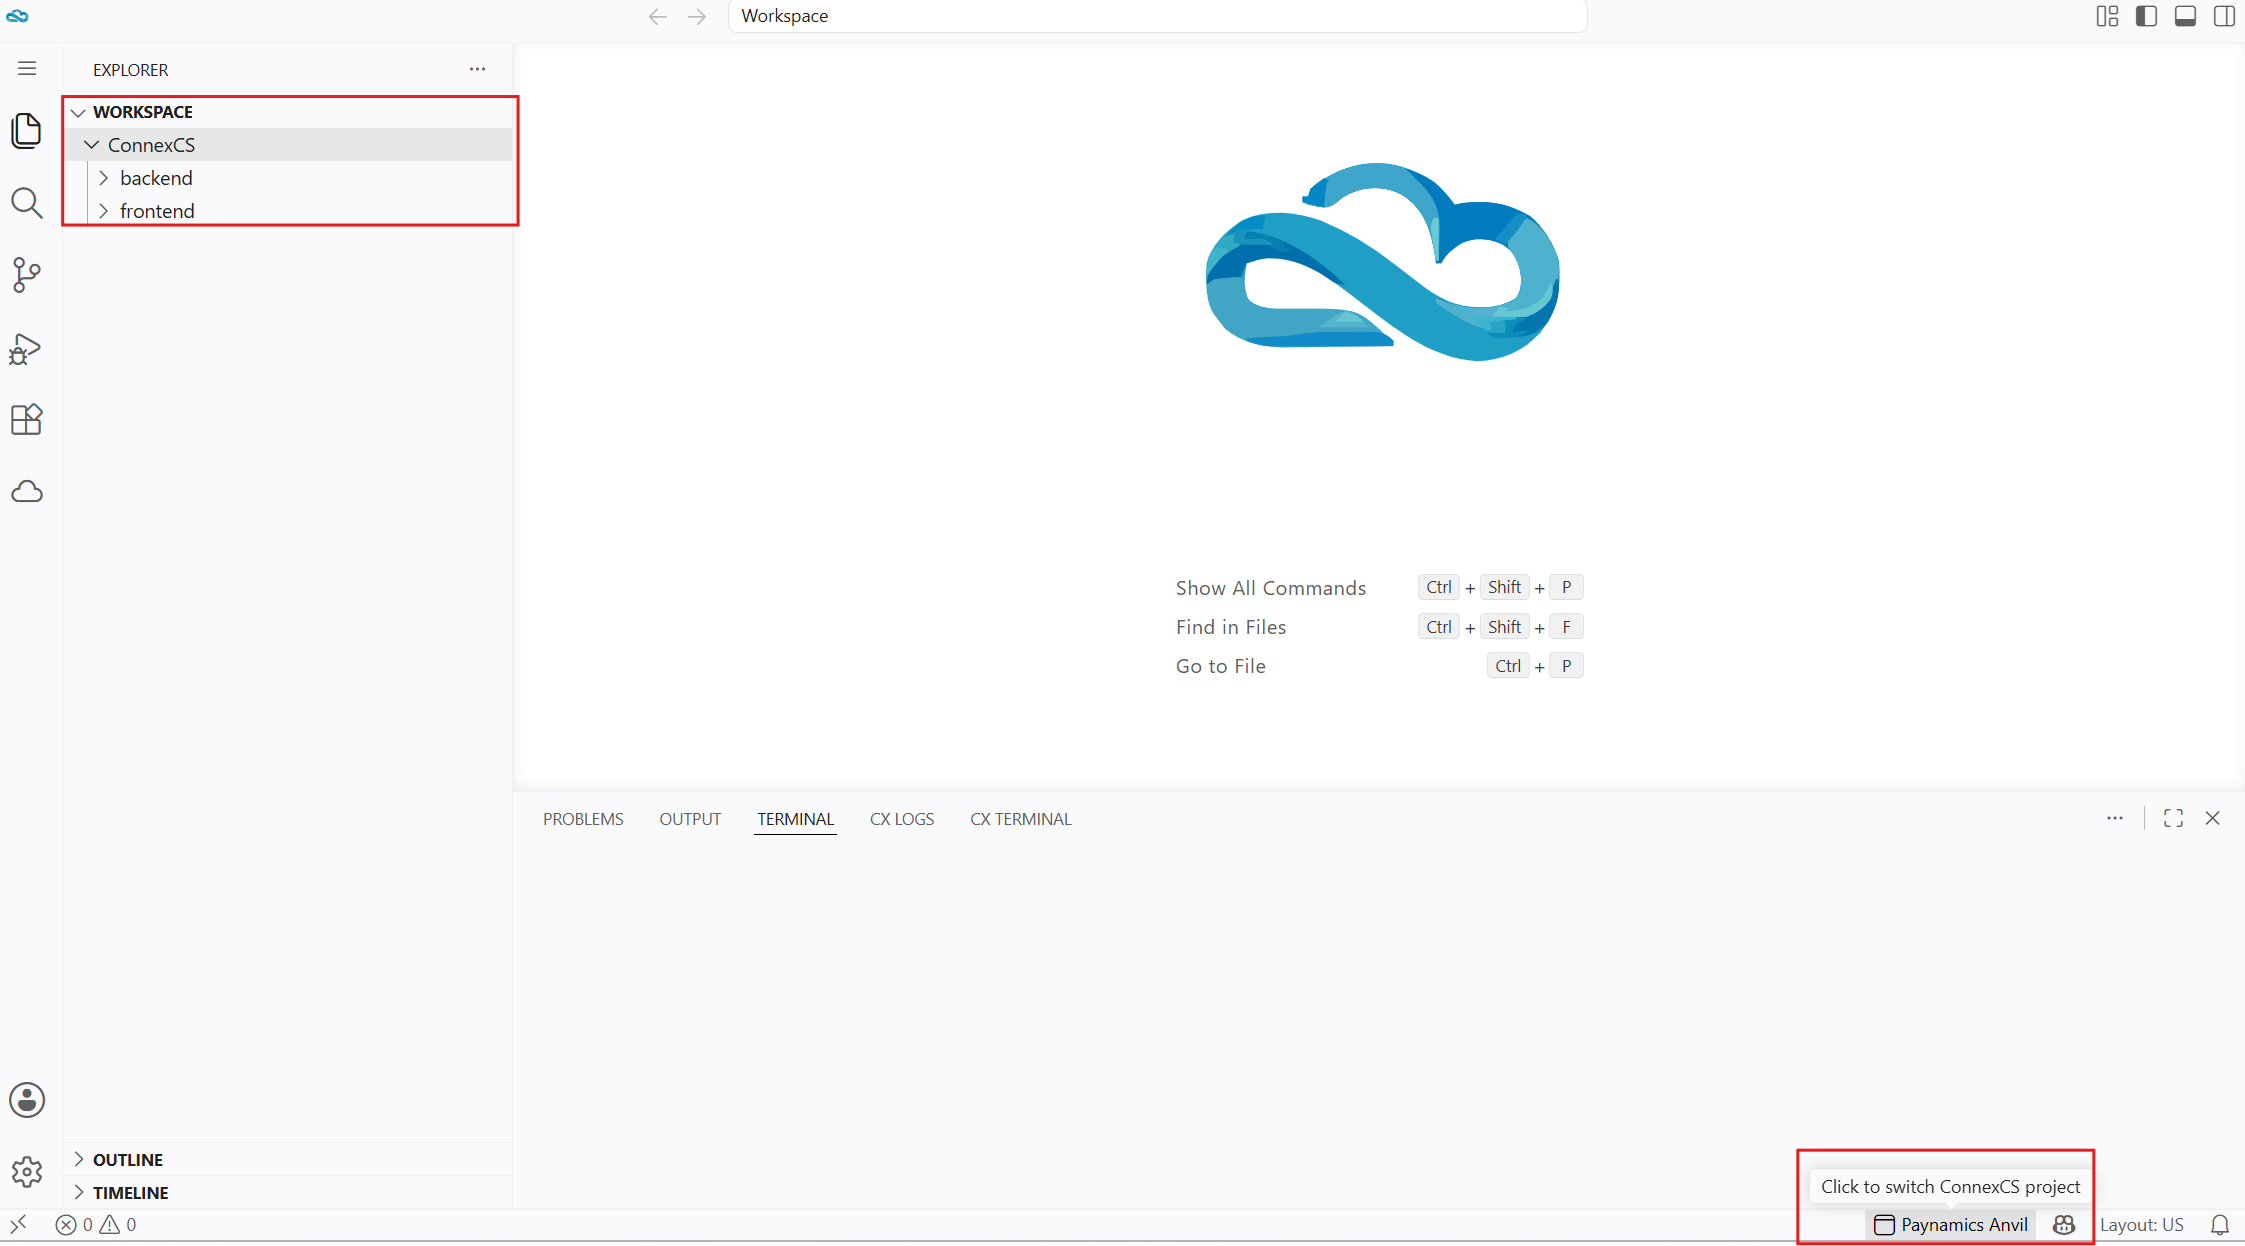
After signing in you will see your files and a status bar entry at the bottom of the screen showing your active project.
Selecting a Project
After signing in, a Welcome panel appears if you have not yet selected a project. From here you can:
- Search and select from your existing ConnexCS projects
- Browse recently used projects
Once a project is selected, the file explorer shows all your Anvil project files (scripts, templates, frontend components, and other resources).
To switch projects at any time, click the project name in the status bar at the bottom, or use the Switch Project option in the ConnexCS sidebar.